
Dress Diary: Experiments in Hemp Cording Part 2: Early 16th Century Purple Silk Florentine Gown

Introduction:
This gown represents my second attempt at creating a hemp stiffened bodice. Like the first dress, it’s based on the garments worn in the first quarter of the 16th century in Florence. This dress was entirely hand-sewn. My previous Florentine gown was hand-sewn except for the cording channels. Since that dress was my first attempt at any sort of corded bodice, it felt more comfortable to machine sew the channels to ensure they were stable and secure. This time I decided to completely hand-sew everything. Along with hand-sewing, only stitches documentable to the time period (running, whip, and back-stitches) were used as part of an ongoing journey toward more period correct construction. I used 100% natural fabrics in the body of the dress. The sleeves were sewn out of a polyester velvet damask since that was the only sort of damask that could be found within budget.
Corded bodices are one of the theoretical construction methods for dresses in the Italian city-states during first half of the 16th century. During this time separate pairs of bodies are not believed to have been used. Unfortunately, no extent garments from the era survive but corded bodices do produce the more rounded shapes seen in Italian art of the period. Other possible construction methods include pad-stitching and stiffened linen. The cording choices on this dress were an attempt to improve on both the comfort and look of the first attempt. Completing this dress also gave me ideas for a third attempt at hemp stiffening with a slightly different method.
Another goal was to incorporate feedback that I’d received during my judging at the 2018 Calontir Queen’s Prize competition. Those suggestions included a more complicated guard design, eyelets with smaller holes, as well as smaller overall stitches. The smaller stitches were accomplished by purchasing size 10 sharp needles; the shorter and thinner design of those needles worked well for precise hand-sewn work.
Materials:
19.5mm purple silk charmeuse
Mid-weight linen
Wool felt
Synthetic velvet gold damask (sleeves)
Gold polyester velvet ribbon
Purple cotton crochet cord
Purple cotton embroidery floss
Gold silk embroidery floss
Poly-cotton and cotton thread
Wooden lucet
Size 10 sharp hand-sewing needles
Construction:
The exterior fabric of the gown is made from purple silk charmeuse. Between the silk and the hemp corded portion of the bodice is a layer of wool felt. This was done to prevent the cording from showing through the silk due to its thinness. There’s no additional fabric between the bodice and outer fabric on my blue Florentine dress and the outline of the cording is lightly visible. Thankfully, the wool felt eliminated that problem on this dress. The corded bodice consists of two layers of mid-weight linen and another final layer of linen on the back side of the bodice.

Preparing to trace the pattern. Alterations would be made to the fabric once drawn as this is the original pattern.

My original bodice pattern was adapted from Janet Arnold’s Patterns of Fashion 3, with customizations in terms of both fit and design to make it more specifically period appropriate for Florence in the first quarter of the 16th century. For this project there were additional changes I wanted to make to improve on both the period specificity and the hemp stiffening. One difference was in the overall size of both the front and back pieces. While the first dress was tight enough to be self-supporting, I felt as though there was room to take it in. This new pattern is just over three inches smaller than the previous one. Two inches were taken from the front piece and a little over one inch from the back. In retrospect, that was a little overzealous and I will add and inch or so back to the front bodice pattern in the next iteration.
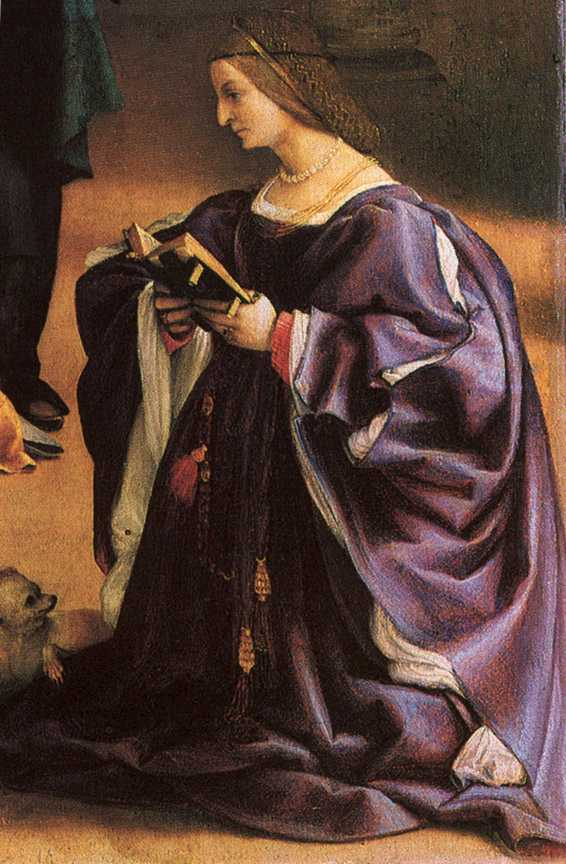
Purple is a less common, though not unheard of[1], color choice for a first quarter 16th century dress from one of the Italian city-states. Shades of red were the most popular color for garments, but black (morello), purple (perssi), blue-violet (pavonazzo), and rich blue (alessandrino) were also valued.[2] In this particular case, the ability to document the color was welcome but the primary desire was to create a Florentine dress in the colors of my SCA kingdom: purple and gold. That’s also the explanation for the gold guards on the bodice and skirt. Black is the overwhelming choice for guards on clothing of the time. However, both Raphael’s painting: Young Woman with Unicorn c 1505 as well as his painting: Portrait of a Young Woman (La Muta) c 1507-1508 display velvet guards that are red. Running with this evidence of other options, I decided to go ahead and use gold.
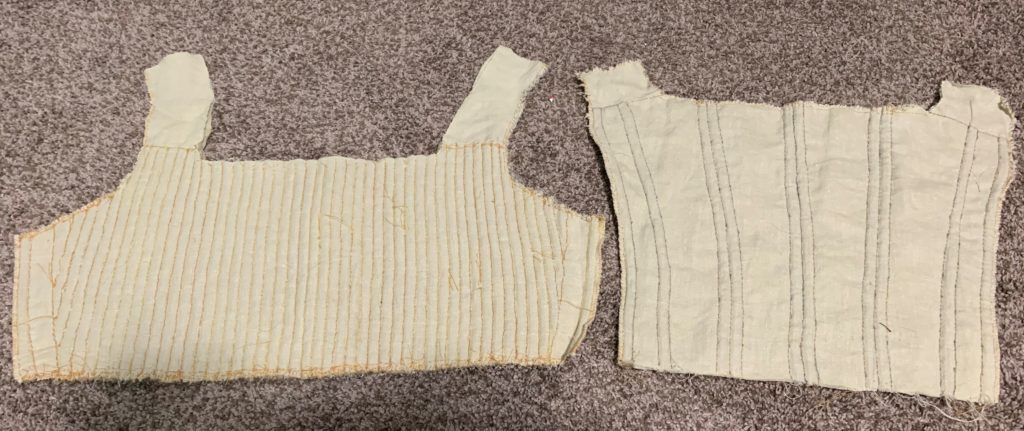
The project began with the hemp corded bodice. As previously stated, two layers of midweight linen were cut out in both the front and back bodice patterns. Channels were sewn using back stitching through these two layers and the hemp cording threaded within them. In my previous attempt I used 1/16 inch thick hemp cording. I found this cord to be so thin that it had next to no ability to be compressed. The resulting bodice felt stiffer than I had expected; decreasing its comfort and necessitating the addition of two linen layers between the bodice and my body so I could wear it for any length of time. This time I used hemp cord that was 1/8th of an inch thick and sewed fewer channels. Instead of 1/4-inch-wide channels, I used 1/3-inch-wide channels.
I began by sewing the two pieces of the bodice together on the side edge where the lacing would go. I then measured and drew out the channel lines with pen. The channels do not extend into the shoulder straps but rather end in line with the neckline of the bodice. For extra stability I always put a cording channel between the edge of the bodice pieces and the location of the eyelets. An inch-wide strip of the bodice was left without cording for the placement of the eyelets.


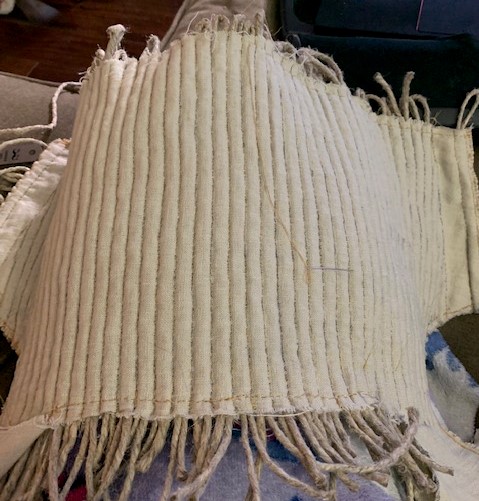
I placed a doubled length of hemp cord within each channel prior to sewing. Previously I’d waited until after all of the channels were sewn before pulling the cord through. That method turned out to be more time consuming than filling the channels as I went along. I made sure that enough of the cord stuck out from either end that they couldn’t move before being sewn down. The front bodice piece had cording that went across the entire length of the piece. This was done to provide maximum structure and support for the bust. The back piece had fewer channels as less support was needed there to shape the body.
Once the channels were sewn and the hemp cord inserted, a row of backstitching was used to secure the hemp. At that point it was safe to cut off the exposed ends of the hemp cord. I then whip stitched around the edges to prevent the linen from fraying. A layer of linen was added to the back of the bodice to cover the channels and add additional comfort.
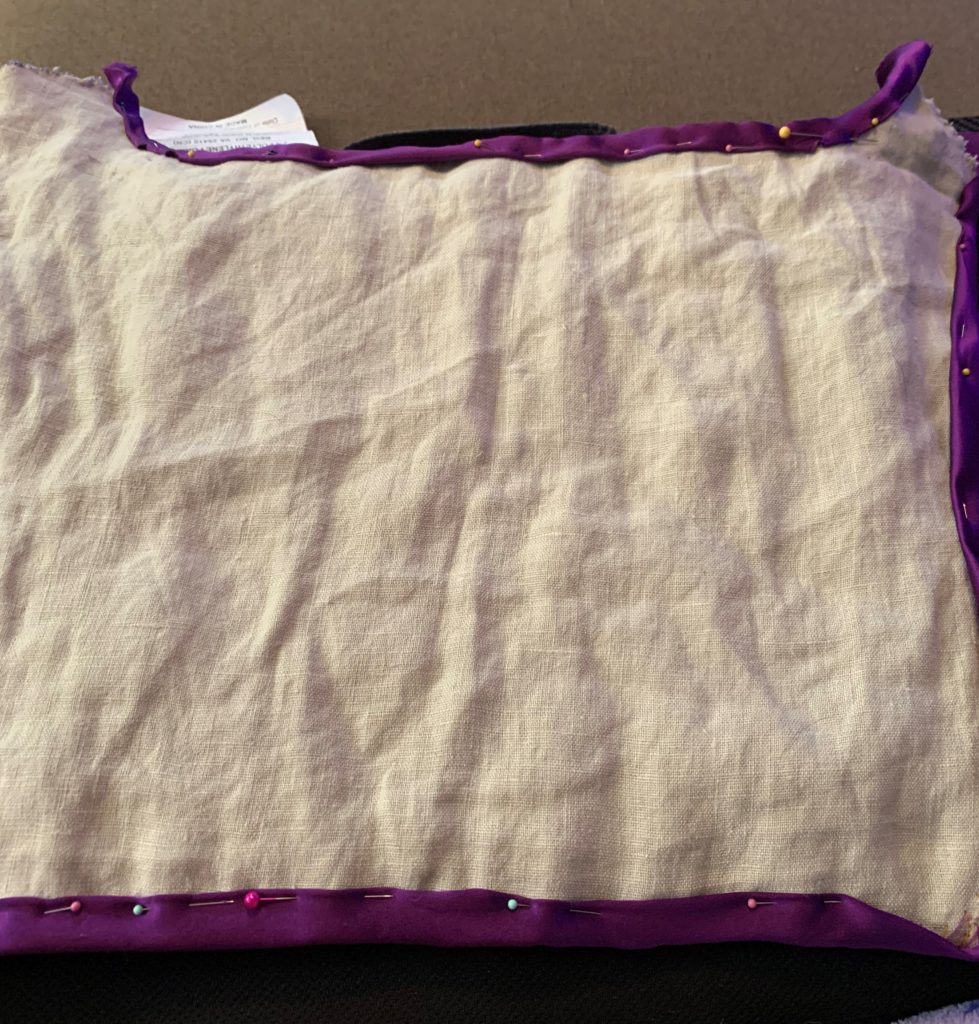
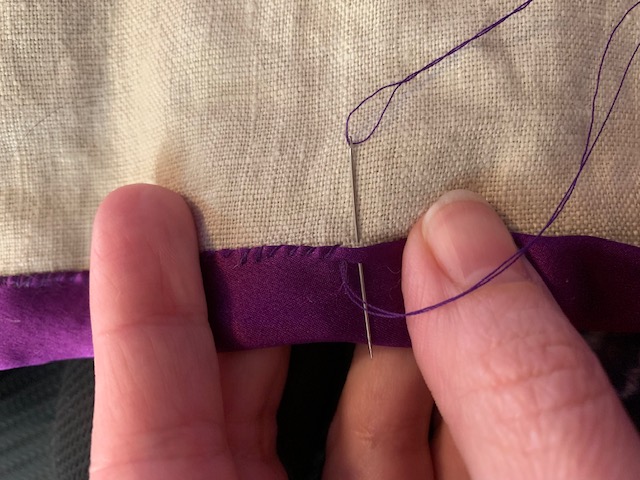
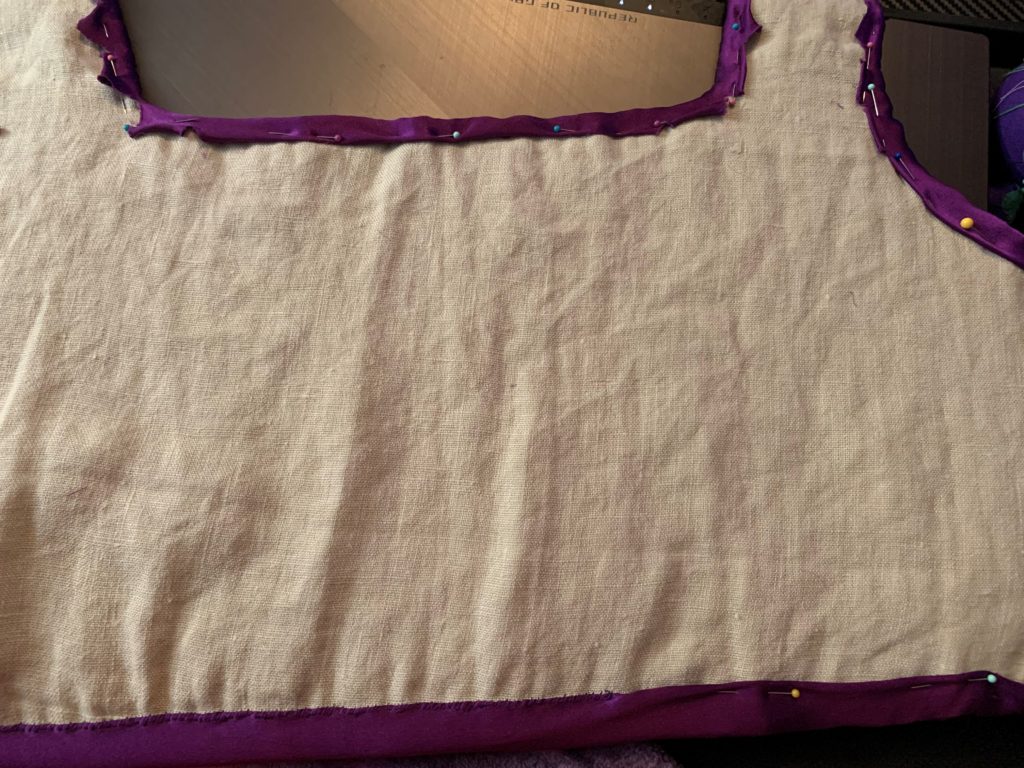
With the corded bodice complete, it was time to add the wool felt and silk. The wool felt was cut to match the bodice pieces and whip stitched to the front of the bodice. I also added a layer of linen to the back using the same method. The silk was then folded over to conceal the raw edge, and draped over the front and back piece. The edge was pinned in placed and then whip stitched to secure it to the padded corded bodice as well as keep any raw edges from fraying. I used small cuts in the silk to help it stretch around the curves of the bodice.

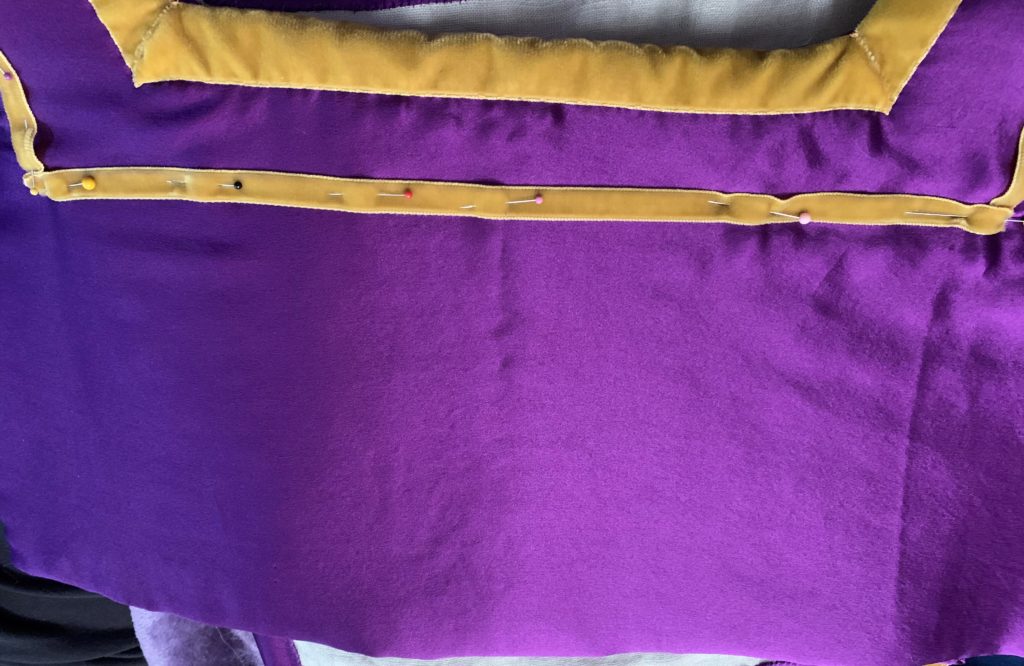
Once the silk was fully attached to the bodice, I moved onto the velvet guards. The guards consisted of two sizes of synthetic velvet ribbon. The wider ribbon was 0.875 inches wide and the narrower one was 0.375 inches.
The velvet guards were pinned to the garment and then sewn using small running stitches. The arrangement of the guards was designed to replicate those seen in St. John the Baptist.[3] Double rows of bodice trim were a common adornment in dresses of the time. When there were two ribbons, the top guard was thicker than the bottom.
Each band was kept in one piece by folding the ribbon over itself to fit around the corners. The corners were whip stitched down to keep the ribbon from moving.

The final step in finishing the bodice was to add the eyelets. The holes were placed in a spiral lacing pattern as can found on the Festive Attyre Website.[4] Holes were punched with an awl.

The eyelets were hand-sewn with commercial cotton embroidery thread with a buttonhole stitch. Each side had seven eyelets for a total of twenty-eight. Two eyelets were also placed at the top of each shoulder strap 1.5 inches on either side of the seam. The shoulder eyelets would be used to attach the sleeves later.
Lacing cord was made using cotton crochet thread on a lucet. Lucets produce a springy cord that is well suited to dress lacing. Several portraits show cords that match the color of the dress which is why purple crochet thread was chosen.

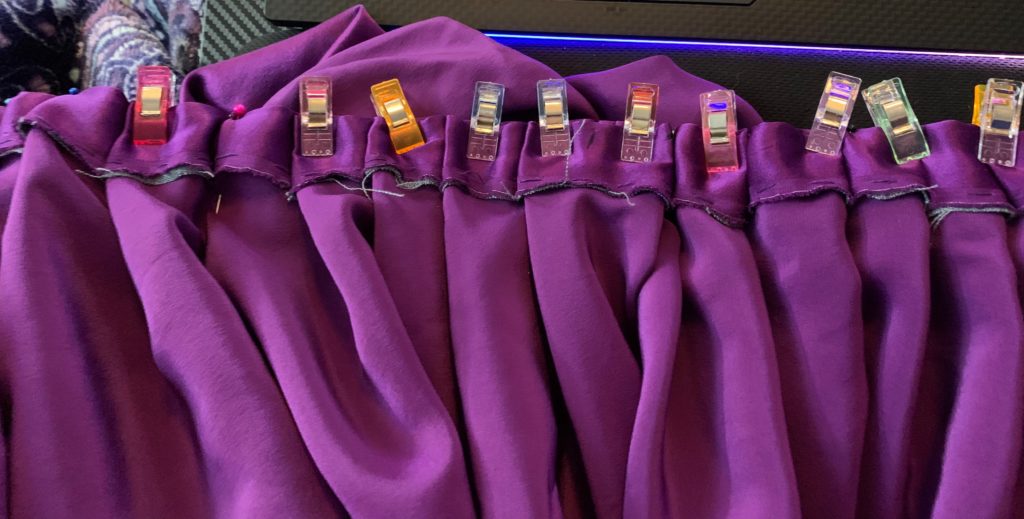
Once the eyelets were complete, the next step was to pleat the skirt. An inch-wide strip of mid-weight linen was basted to the entire length of the skirt fabric before pleating to add stiffness and stability to the fabric. The edge was then folded over, sandwiching the linen within the silk. The skirt was pleated with knife pleats with the exception of a single box pleat in the middle of both the front and the back. The pleated skirt fabric was pinned directly onto the bodice and then sewn using whip stitches. Initially the pleats were 2 inches wide but that looked too large to match the portraits, so it was reduced to 1.5 inches. Traditional knife and box pleats are created using a 3:1 ratio: i.e. 3 inches of skirt fabric is pleated onto one inch of bodice. Since silk charmeuse is a thin material, however, I decided to adjust the ratio to 3.5:1 in order to add additional fullness that we see in the portaiture.


With the skirt attached, I moved onto adding a layer of wool felt to the bottom of the skirt. This is an Italian method called doppia[5] and was used to stiffen the bottom of the skirt, allowing it to “poof” out a little. A six-inch strip of wool felt was folded over lengthwise and then encased within a layer of purple silk. It was then stitched to the underside of the bottom of the skirt. This stiffening made it easier to walk without the skirt tangling between the legs and added a slight petticoat effect. When worn over an underskirt constructed in a similar way, the skirts glided gracefully above the ground.

The final step in the creation of dress was to attach the velvet guard to the bottom of the skirt. The wider of the two velvet ribbons was used. It was positioned 2.5 inches above the bottom of the hem and sewn on using running stitches. This placement allowed me to cover up the stitches visible from attaching the wool felt with the velvet trim.
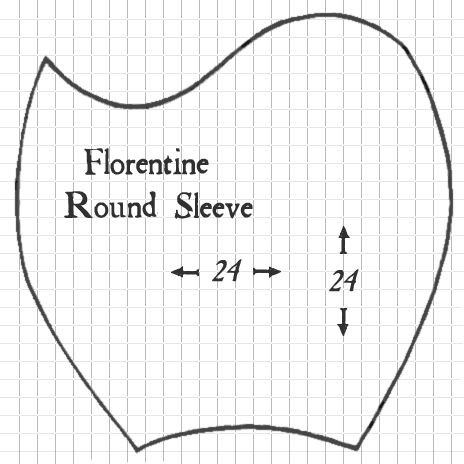
The sleeves were created using the same pattern as the blue Florentine gown. That pattern was adapted from a now defunct section of the Festive Attyre website. This is my favorite method for creating the “bag sleeve” style shown in dresses found in the first quarter of the 16th century in Florence. For this project I did enlarge the pattern by about an inch in both directions to provide an even fuller sleeve. In addition, I decreased the bottom distance of the sleeves slightly so as not to be quite so loose around my wrists.
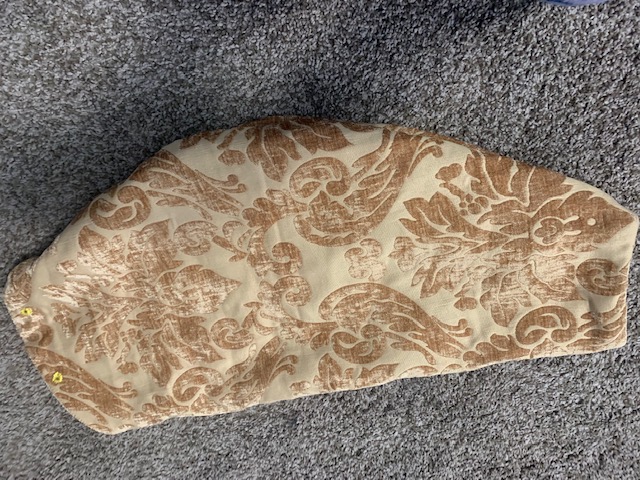
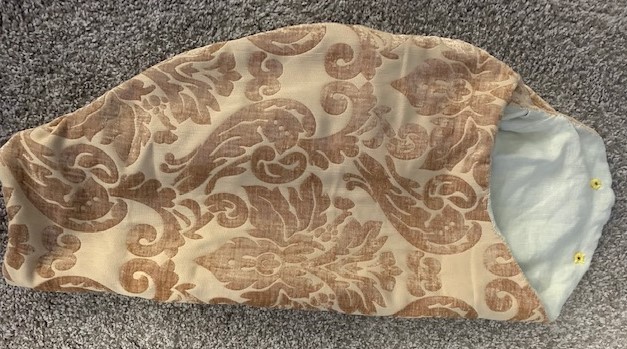
The sleeves were constructed from a layer of synthetic velvet damask lined with linen. While not a natural fiber, the tone on tone damask pattern is one that can be seen in the sleeves of 16th Century Italian paintings. Sleeves on Florentine dresses of the time often contrasted, so I decided to choose golden yellow to keep with the desired purple/gold color scheme.
Two sleeves were cut out of each material. Each sleeve piece was sewn into the sleeve shape using back stitches. I then placed the linen lining into the damask sleeve so that the right edges were facing outward. The lining and outer fabric were folded under so that both edges would be inside the sleeve to keep them from fraying. I whip stitched around the sleeve openings to secure them in place.

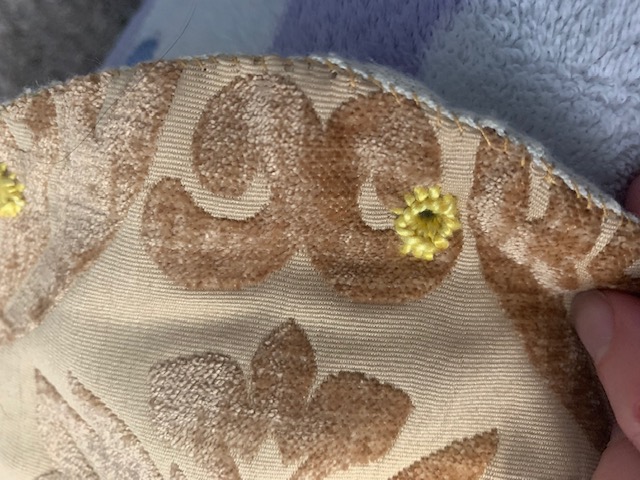
Once the sleeves were assembled, I added the holes for the eyelets. As seen in the gown they are located .5 inches from the top and each is 1.5 inches from the center of the shoulder. The eyelets were once again hand punched with an awl and then sewn with a buttonhole stitch. These eyelets allow the sleeves to be tied to the shoulder strap of the dress.
Conclusion
Overall this dress represents an improvement over the previous hemp stiffened one. The wider hemp cords combined with the slightly larger channels produced a more comfortable bodice. This allowed the dress to not need to add an additional layer of linen on the back side of the bodice while still providing the support and shaping required to be consistent with the portraiture. I also discovered that fewer channels are required in the back piece of the bodice to achieve the desired silhouette.
Despite the success of this hemp cording experiment, there are changes I will make the next time. To begin with I won’t extend the cords all the way up to the top edge of the bodice but will instead leave a half inch or so of unstiffened fabric all the way around. This will further improve the comfort of the dress under the arms as it will prevent the hemp cording from digging into the skin there when my arms are at my side. I’m also planning on trying out a Pfalgrafin[6] style corded bodice. This style dates to the end of the 16th century and may produce a more rounded bust.
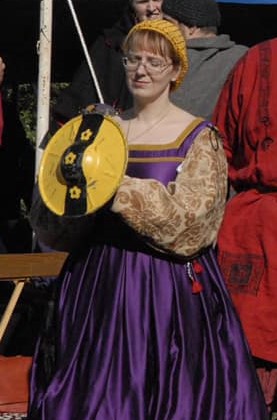
This was also my first gown made of 100% silk. Previously I have sewn dresses out of linen/linen blends or cotton velveteen. Due to its slippery nature and tendency to fray easily, silk was more difficult to work with. The way it draped and shone in the sunlight, however, made the extra effort well worth it. The purple and gold color combination worked out well and I am very happy with what I’ve dubbed my “Calontir Pride” dress.
[1] Lorenzo Lotto, 1521 Christ Taking Leave of His Mother, Available at Realm of Venus: http://realmofvenus.renaissanceitaly.net/wardrobe/artgallery2b.htm
[2] Frick, Dressing Renaissance Florence pgs. 101-103
[3] Bacchiacca, The Preaching of St. John the Baptist, Museum of Fine Arts, Budapest https://commons.wikimedia.org/wiki/File:Bacchiacca_-_The_Preaching_of_Saint_John_the_Baptist_-_WGA1105.jpg
[4] Johnson, Festive Attyre : http://www.festiveattyre.com/p/the-zen-of-spiral-lacing.html
[5] Documentation for the use of the doppia method was found on the Anea Files website. Unfortunately, the website is no longer active and a proper citation cannot be displayed.
[6] Donner, Historical Sewing Adventures http://www.morgandonner.com/2013/12/matching-russet-outfits-part-2/